Electronics tutorials
Viewed products
-

"Eagle" software ground plane tutorial
When we have an audio circuit, it is...
 View larger

"Eagle" software ground plane tutorial
When we have an audio circuit, it is necessary, for the better shielding, and to avoid unnecessary noise, to create a ground plane.
More info
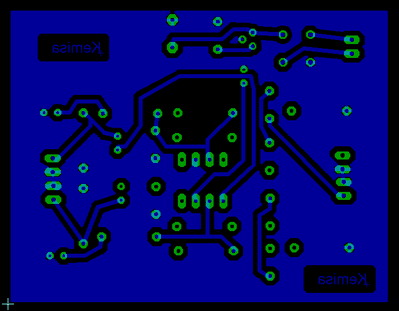
That is, cover with a negative pole the major possible quantity of copper, on the op as well as on the bottom of our printed circuit board. We’ll give you a practical example with our previous stereo assembly for turntables. Once we have the board ready, on its place and with its components, and the tracks completely finished, we shall do the following to create the ground plane.
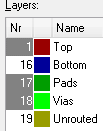
Firstly, we select the icon  , the top cap, the pads and the Vias.
Afterwards, in Tools, on the left, we select “polygon”. 
In the part above, the options of the mentioned tool are created for us. We are going to look for the one called “insolate”, which is on “0” by default.
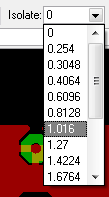
With this number we are going to define the distance which will be put between our ground plane and the tracks. A small number, like “0”, indicates less distance, and a bigger number indicates bigger distance.
A “1.016” value of “insolate” can be an acceptable value; it’s a question of experimenting with the distance we like the most.
Small distance between the tracks can provoke an undesired contact because of the attack of a little aggressive acid. Now we shall create a polygon around our printed circuit board.
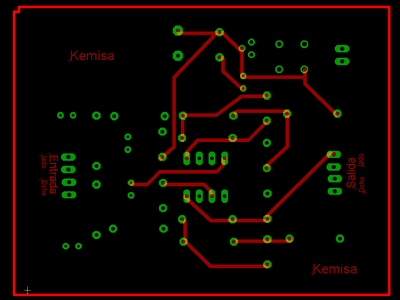
Now, in the tools on the left, we select an icon “name”  and a window is opened where we write a name that we have given to our negative pole, GND in our case.
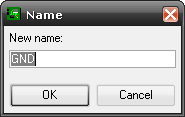
The program will then ask us with what signal we want to connect.
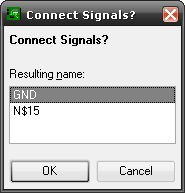
We select GND and click on “accept”. And this is the result.
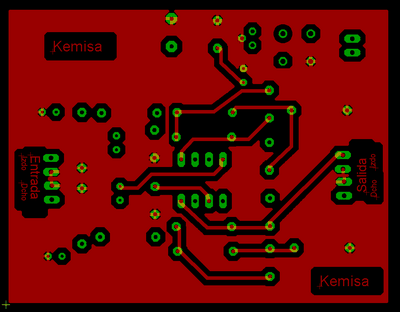
We repeat the same steps for the bottom cap, and this is how we have created a ground plane on both sides.