Home circuits
Viewed products
-

On-off sensor circuit
This circuit can be set up in any...


On-off sensor circuit
This circuit can be set up in any computer you want to switch on/off by bringing your finger or any object close to the sensor.
Data sheet
| Design | Schema and circuit |
| View | No display |
| Supply voltage | 5 Volts |
| Electronic | Digital |
| Photo | Yes |
More info
The circuit is based on another one published in this website entitled "Proximity sensor power on for Pc" to be found among the circuits appropriated for the computer.
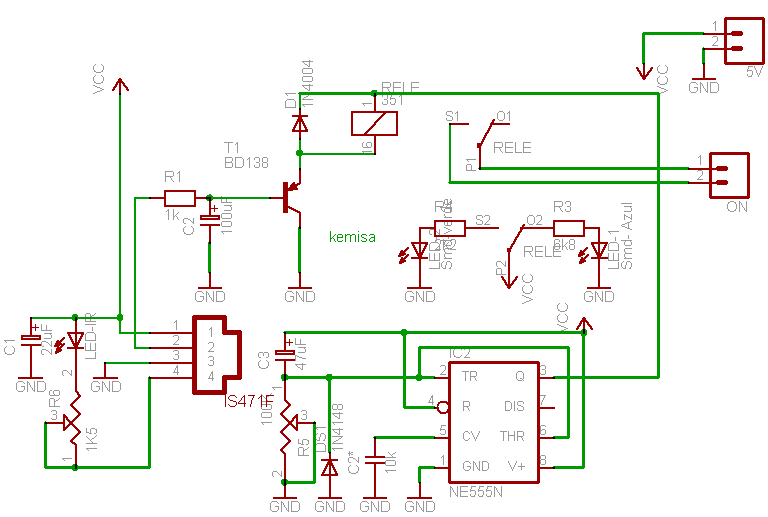
This on/off sensor is made up of two parts: the remote-control sensor (Circuit 1); the on/ off relay by impulse (Circuit 2).
Both circuits are linked up with two cables to 2-pin molex plugs.
The first circuit is made up of a remote-control based on the integrated infrared receiver IS471F.
The transmitter is an infrared LED that emits a modulated signal aimed at the 4-pin monitored by the IS471F. Being reflected in a nearby object, the signal is bounced off and captured by the IS471F internal demodulator.
The output originated in the 2-pin from the integrated circuit excites a relay for a time period that we can alter with the variable R6 resistor.
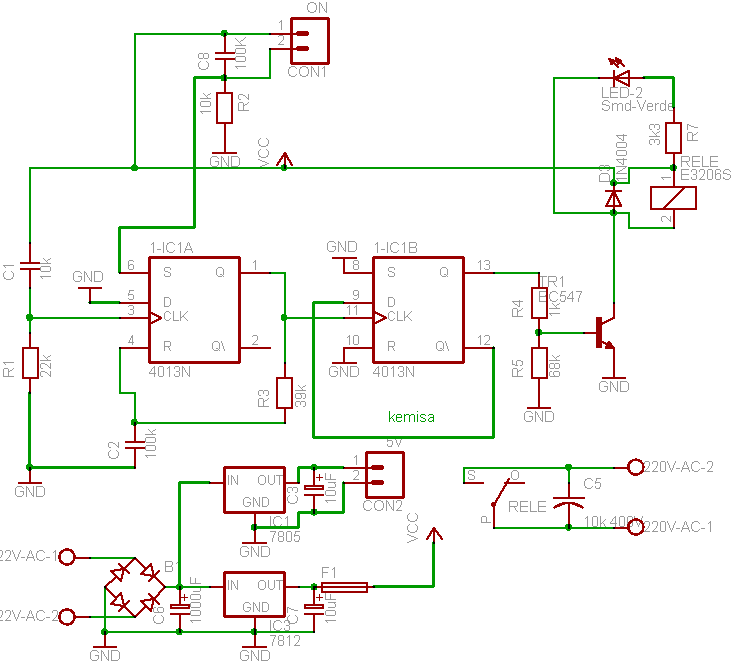
This relay output is connected to our second circuit (Circuit 2) through the connector marked ON.The running of this second circuit is based on the 4013 integrated circuit internally made up of two flip-flop.
Every time that our 4013 integrated receives an impulse through the 3-pin input, actually the "ON" connector (labeled CON1), we will give an impulse to the next flip-flop through the 11-pin.
Through this bistable oscillator each impulse at the input will be altered in the 13-pin output.
Having connected a transistor to the 13-pin output in order to set off a relay, this relay will be altered by each impulse and therefore will switch on/off whichever connected device. The circuit is 12 volts powered.
A small power supply with two outputs has been put in: a 12 volts that will feed the circuit 2 and another of 5 volts that will feed permanently the circuit 1.
The input ranges from 12 to 22 volts AC and we can get it directly from the power transformer of our system.
Connection between C1 and C2, as we have already said, is made possible through two 2-pin molex connectors, one for the 5 volts output and the other for the on/off impulse.
Be careful not to get it wrong when connecting them, even if when downloading the circuit board both are clearly singled out.
Circuit 1, distance sensor schema.
Circuit 2, on/off switch schema.
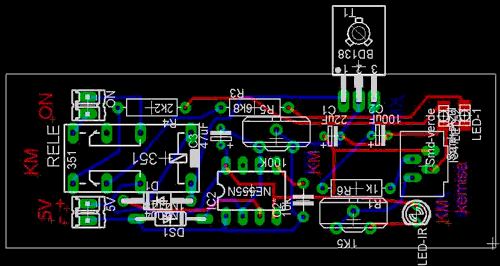
Circuit 1, sensor board circuit
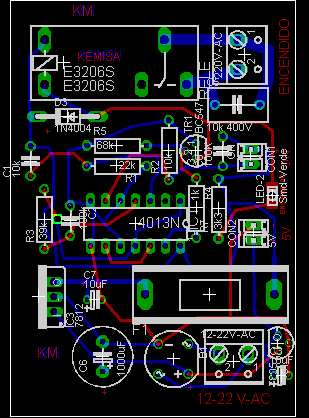
Circuit 2, on/off switch system.
The on-off circuit set up in one of our systems.