How to make a printed circuit boards
Viewed products
-

How to make printed circuit boards Part 2
Now we’ll prepare the glass fiber. We...
 View larger
How to make printed circuit boards Part 2
Now we’ll prepare the glass fiber. We are going to cut it a bit bigger than our design, leaving a small margin.
More info
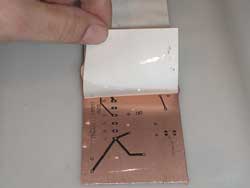
We cut the page design, where the “Top” parts were in normal vision. We attach the page to the glass fiber with a little bit of sellotape.
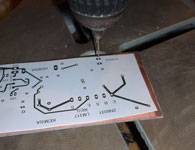
We choose two pads which are situated at both extremes of the design, one that is at the upper part and the other one at the other extreme end, but in the lower part.
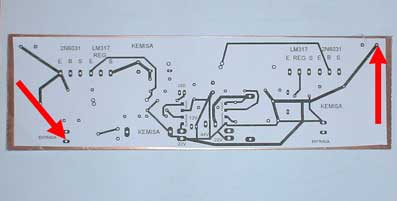
We make a hole with a hand drill in the mentioned pads.
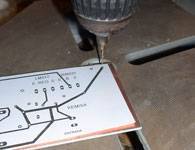
The hole should be 0.8 mm wide.
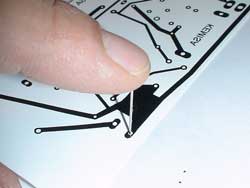
We have to look carefully at the pads we have chosen, since now we have to make a small hole with a pin in the photograph paper, on the page which coincides with “Top” mirrored part and with the “Bottom” part.

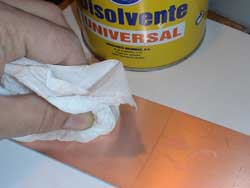
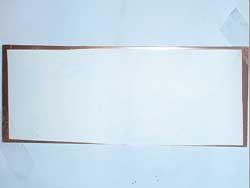
We now leave a photograph paper with design and we take a kitchen towel and a solvent. We remove the page which was attached to the glass fiber and we rub the copper with the kitchen towel dipped into the solvent, so that it becomes shiny on both sides.
Once we have done this, we mustn’t touch the copper with our finger, and that is why we’ll take the board by the edges. If we touch it the toner won’t be printed later on the board.
Now we have to fit the little holes we had made in the photograph paper onto the hole made by the hand drill. We’ll attach it with the sellotape.
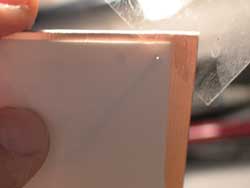
Ok, so far, so good. Now we take an object against which men and women likewise bear a grudge, our beloved iron.
We adjust it on the half of the scale, marked as “cotton”. And, of course, without vapour. We wait until it’s hot and we start pressing a paper which covers our glass fiber with the iron.
It goes without saying that you should put another cloth between the glass fiber and the table. We continue ironing and we alternately press it strongly with a cloth. We repeat the process on the other side.
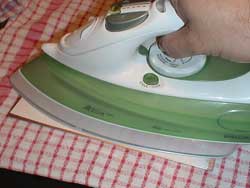
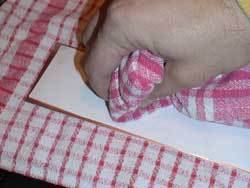
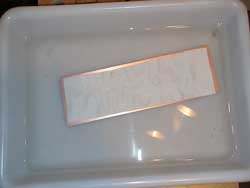
We should spare 10 minutes on each side, ironing and pressing with a cloth. Immediately after this, while the glass fiber is still very hot, we place it in a recipient filled with cold water and we leave it there for 10 minutes.
It’s a mistake if you leave the copper to cool it; it’s supposed to be placed in the cold water while it’s still very hot.
After 10 minutes we remove the paper from the copper very slowly. If we have done it properly, the paper should come of easily.