How to make a printed circuit boards
Viewed products
-

How to make printed circuit boards Part 3
Now we’ll prepare the glass fiber. We...
 View larger
How to make printed circuit boards Part 3
Now we’ll prepare the glass fiber. We are going to cut it a bit bigger than our design, leaving a small margin.
More info
First one can be found in pharmacies and the second one in the shops of cleaning products.
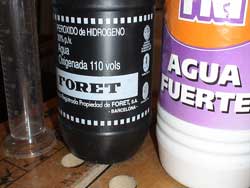

We also need a test tube to make an exact measurement, and a plastic container where we’ll put a glass fiber immersed in acid. The mixture will be: one part of the 110 volume oxygenized water, one part of a hydrochloric acid solution and a one part and a half of tap water.
To help you imagine the quantity, for this board (20x6 cm9 we have used 50 cc of oxygenated water, 50 cc of hydrochloric acid solution and 75 cc of tap water. Once we make a mixture, we continue to immerse our board in acid.
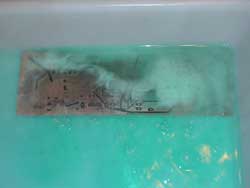
Carefully, you should always wear a mask and do this in a ventilated room, or even outside.
The vapour that comes out is very toxic. We rock gently the recipient (left and right) so that the acid moves and attacks the whole board evenly.
When we notice that all of the copper that wasn’t covered by toner is consumed, we pull out the board, with the gloves put on, and we put it under the tap for a moment.
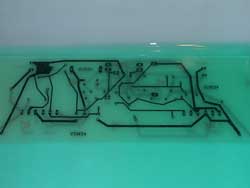
Now when we have finished the board, the only thing left is to remove the toner. We dip the kitchen towel in the solvent and we remove it little by little.
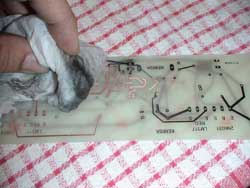
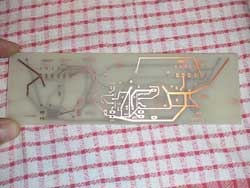
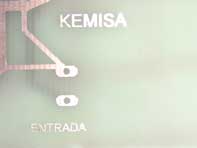
The final result, as you can see, is pretty good.
The details can be seen perfectly, like our name KEMISA.